I’ve been struggling a long time with photographing minis. I know the mantra – “MORE LIGHT!” and I’ve tried all sorts of different configurations and setups with my Canon PowerShot. It just took setting up the home-made light box, getting the tripod out, setting up the lights, all things… c’mon, man, I’ve got minis to paint, terrain to build and games to play!
TL;DR version – Make a white foamboard L for a background/light reflection. Get about 300 watts (equivalent) of daylight spectrum light on the figures. Get the figures close to the lights, but not too close. Set your phone to ISO 200, Exposure adjustment to +1 or +1.5 (whichever suits your eye) and take photos! Quick and easy. I did this with a Samsung 5S. Your camera may vary in settings, but you should be able to find quick/dirty settings that work decently.
Recently, I tried something really quick and I’ve gotten some good results, so I thought I’d share the “WIP” on taking photographs. I am still a rank newbie and as long as I get the point across with the photos and the minis don’t look like complete crap, I’m OK with it.
I have an older smartphone, the Samsung Galaxy 5S. It’s got a decent camera and it can certainly take enough pixels in to get a nice shot.
I’ve also got a homebrew light box that I built awhile back, using white foam board. Both of them get used in my setup. I also have an overhead light in my work-nook that is a 100 or 150 watt-equivalent LED daylight spectrum bulb. I also have two hobby lamps with 27 watt (equivalent to 100 watts) daylight flourescent bulbs in them. 300 watts should be enough to get some decent photos.
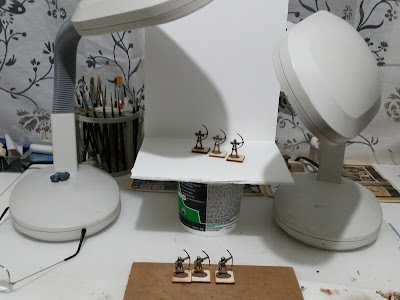
To feed my need for quick set up, I reduced my setup to a minimum. I use a small bucket of spackle to rest an L shaped background on, using something behind the back to prop it up. I shine one of the lights from the top and the other from the front/side. This puts the figures close to the light, and that white foamboard bounces the light off nicely to illuminate most of the model. Here’s what it looks like:
So I’ve got the setup, what about the camera.
Well, going back to the rule of “MOAHR LIGHT” and remembering what I learned through painful struggle with the Canon Powershot, I looked for two settings on my smartphone camera app – Exposure and ISO.
ISO is basically how sensitive the camera is to light. With digital cameras, the ISO can be used quite powerfully to ensure that you get the max out of each pixel. There’s a downside to ISO though – the higher the ISO, the more grainy the shot can become. So you have to find that sweetspot. Through experimenting, I knew that ISOs of 200 to 400 seem to be a good range for the Powershot, so I put my Samsung to ISO of 200.
Next is exposure. Since I don’t have a lot of control over the shutter, bumping up the exposure is what allows me to make sure that I get more light into into the lens and CCDs of the camera. The CCDs are what pick up the photons of light and translate them into pixels. Since I can’t do things like control the aperture and shutter speed on the smart phone (or I’m still an idiot and haven’t figure it out…), I use the exposure adjustment to help with that. Tom’s Guide To Hardware explains it like this: The S5’s Exposure value menu item lets you manually adjust exposure (how much light the camera sensor is exposed to), ranging from an exposure value of -2.0 (darkest) to 2.0 (brightest).
So with both of these things to tinker with, I started taking photos. They turn out great!
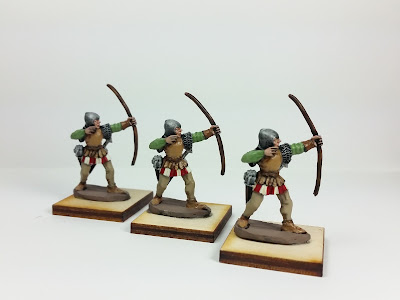
Here’s one set of archers with the camera settings to ISO 200, Exposure +1 (left), +1.5 (right):
It’s pretty obvious to my idiot eye that the photo on the right (or bottom if you’re on a phone/tablet) is brighter and allows more of the color to come through. I was pretty satisfied that this picture is showing what I see with my own two eyes, same colors and brightness. The photos look pretty good (and my paint job isn’t as bad as I thought!)
Here’s another set of archers. ISO 200, Exposure +1 (left), +1.5 (right):
Once again, the picture on the right lets in more light and color, and looks pretty decent! (dammit, I rubbed off some paint on the center dude’s shoe. That’s OK, basing material will cover it. LOL)
The only thing I might do is get one of those little tripods you can put a smart phone on. I have electrician’s shake in my hands and I’m sure they’d be better with the camera steady.
That’s it! What do you think? Easy peasy and hopefully you can find a way to replicate my approach on your phone.


